
7 Vermicomposting System
Equipment and Materials:
- Worm bins
- Options include:
- Plastic Tubs with air holes drilled around the top inch. (Tubs must not be clear)
- Premade flow through bins such as the Hungry Bin or Worm Tower or other flow through systems
- Options include:
- Red wiggler worms
- Calculations regarding volume of waste to be processed and the amount of worm bins and worms needed will be provided in accompanying report.
- Thermometer for air temperature
- Meat Thermometer for bin temperature
- Protective gloves and aprons (as needed)
- Spray Bottle
- Cardboard and paper cut into strips (And a place to store it)
- Grit (Sand or Crushed Egg Shells)
- Optional – Weigh scale to collect total weight diverted
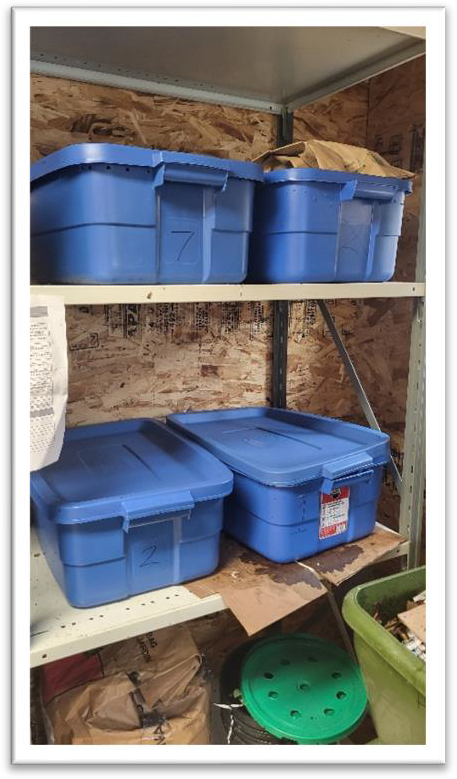
Plastic Tubs set up as Worm Composters
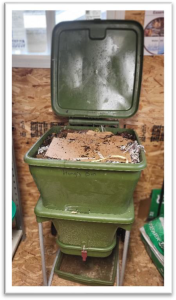
The Hungry Bin Flow through Worm Composting system
Setting Up the Vermicomposting System:
- Select an appropriate location for the vermicomposting system, considering temperature, ventilation, and accessibility.
- Choose a well ventilated, temperature-controlled area that is easy to access in order to process the material.
- Assess the amount of material that will need to be processed. (Red wiggler worms will eat half their weight in a day)
-
- Determine how many bins will be required to process this material. Keeping in mind that the same bin will only be fed every 3 -7 days.
-
Bedding
____________________* Stable Compost,
* Coconut Coir
* Shredded Paper
* Shredded Corrugated Cardboard
* Shredded brown leaves - Purchase appropriately sized bins or flow through system.
- We utilized Plastic 10-gallon totes, 20 gallon totes also work well.
- Drill small holes (1/2 inch) around the top inch of the totes for aeration
- Line the bottom of the totes with 4 inches of moist bedding.
- We utilized Plastic 10-gallon totes, 20 gallon totes also work well.
Vegetable Scraps Collection:
(Please refer to Collection Section of this toolkit for more information)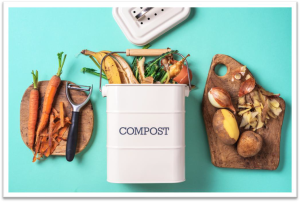
- Set up
- Designate a food waste collection container in the kitchen.
- Educate kitchen staff about the importance of separating vegetable scraps and depositing them in the designated container.
- Collection
- Kitchen to deposit vegetable scraps in designated container.
- Remove Vegetable scraps and move to worm composting area
- Optional – Record overall weight and weight fed to each bin
Feeding the worms
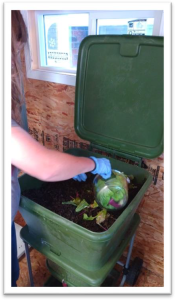
- Pull back bedding material at the top and place vegetable scraps into worm bin. Ensure that:
- Vegetable scraps are evenly distributed to the vermicomposting totes.
- No more than 1 inch of material to each bin at a time.
- Food is only added if most of the feed stock has been consumed.
- Add and mix in 2 parts “brown” material (such as shredded paper or shredded cardboard) for every part of food scraps.
- (Shredded Cardboard is preferred as it soaks up moisture, plus it has a bit of structure in order to hold air space throughout the bin).
- Cover the food with bedding material.
- Add grit once a month to the worm bins (¼ cup/month)
Avoid overfeeding the worms; ensure the amount of food provided is manageable for the worm population.
Monitoring Key Parameters:
Moisture Level
Check the moisture level of the vermicomposting system using your hands. Use the hand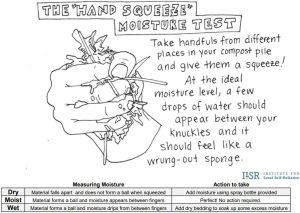 squeeze test to measure moisture.
Maintain the moisture level at optimum levels. To do this you can:
- Utilize a spray bottle to spray water onto the bedding material if it’s too dry
- Add additional dry bedding material if too wet. (Paper or cardboard)
Note – When using food scraps it will likely be quite wet. May require extra carbon/paper materials to “soak up” excess
moisture. Monitor moisture closely to avoid anaerobic conditions.
Temperature:
Measure the temperature inside the totes
- Stick small meat thermometer into substrate and wait for measurement to even out
- Maintain the temperature between 15-30°C (59-86°F), as this is the ideal range for red wiggler worms.
- Too hot – add more carbon material to avoid conditions that create heat. (typically to low C:N Ratio or anaerobic conditions create heat)
- Too Cold – is the temperature outside of the bin getting too cold.
- Maintain the temperature between 15-30°C (59-86°F), as this is the ideal range for red wiggler worms.
- Record bin temperature and air temperature in the log book
20°C is optimal, if it gets + or – 5°C you will want to start taking action to mitigate temperature difference.
Odor Monitoring
Periodically monitor the composting area for any unpleasant odors.
When foul odors are present adjust the:
- moisture level,
- aeration,
- feed rate,
- adjust carbon-to-nitrogen ratio if necessary.
Foul odors are typically due to anaerobic conditions which usually means there is too much moisture, not enough aeration, or not enough carbon or air space. This can be caused by over feeding worms and feed rates may need to be backed off. To fix the problem, mix and aerate the material and add carbon rich “brown materials”.
Pest Control:
Regularly inspect the vermicomposting system for Pests.
- If mites or fruit flies are detected, take appropriate measures such as reducing moisture, adjusting bedding, or covering the food scraps with additional bedding. If fruit fly’s can’t get to the food scraps through a layer of bedding they will not multiply
- Fruit Fly traps can be a good addition to your worm composting area
Harvesting Vermicompost:
- Once your bin becomes too heavy or full the castings can be harvested.
- Monitor the vermicompost’s readiness by its appearance, texture, and the reduction in food waste volume. If it looks like dirt and smells like dirt, it’s ready to go.
- To separate some of the worms from the Vermicast you can encourage the worms to go to move from the area you would like to harvest to an area with fresh food.
- This can be done by only feeding on one side of the bin, or using a harvesting bin with holes in the bottom on top of a freshly fed bin. The worms will migrate to the new feed over a couple of days, leaving the fresh vermicast available for harvesting.
- Note that Red Wiggler worms do not like to be exposed to light, this can be used to encourage worms to migrate to an area so that you can harvest more quickly.
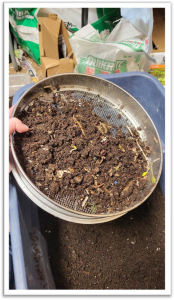
- Once some of the worms have been encouraged to move to another section, castings can be placed onto a screen to separate worms from the castings.
- Utilize a 1/4inch screen as an initial screening tool, then utilize a second 1/8inch screen for the final screening. This should adequately separate castings from the worms and cocoons.
- Weigh and record the weight of the harvested vermicompost.
Refers to Vermicomposting systems that employ a system allowing for feeding on the top and harvesting the finished vermicast product off the bottom of the system.
Composting with red wiggler worms in a controlled and enclosed environment to produce a nutrient- rich compost called Vermicast.
A natural process that turns organic material into a nutrient-rich soil amendment. The process involves the decomposition of organic matter by microorganisms like bacteria, fungi, and other decomposers.
Describe the Carbon Rich Materials. These are usually dry and dead materials such as fallen leaves, wood chips or sawdust, paper or cardboard, straw, etc. Typically with Composting Food Scraps, you will need two parts of “Browns” or Carbon-rich materials to every one part of “Greens” or Nitrogen Rich Materials. This ratio can be adjusted throughout the Composting process to create the best end product.
The leftover or discarded portions of food that are not consumed or used.
The chemical element that is the fundamental building block of life. Carbon-rich material commonly referred to as “browns” includes items like straw, wood chips, sawdust, paper, fall leaves, etc. Carbon is balanced with Nitrogen in the Composting process to transform the raw organic material into the stable humus product recognized as Compost.
Refers to a biological process or organism that occurs or thrives in the absence of oxygen.
Refers to the relative proportions of carbon-rich materials to nitrogen-rich materials in a compost pile. For Composting, the ideal Carbon to Nitrogen ratio is around 25:1 to 40:1.
Nutrient-rich organic material produced through the process of vermicomposting, also known as worm castings or worm poop.
