
9 Windrow Method
This is meant to be a very basic guide to provide an idea of what is involved with setting up a windrow type composting system. However, local guidelines will be different in every jurisdiction. If you decide to utilize this method, it is recommended that you contact the Canadian Composting Council to receive training and certification for operating a Composting Site.
In this method, the feedstocks are mixed and placed in a windrow that is turned based on temperature readings or need. To meet with CFIA regulations and inactivate weeds seeds and destroy pathogens, a windrow Composting system must reach a temperature of 131 degrees Fahrenheit for a period of 15 days with the pile being turned 5 times within those 15 days.
Equipment and Materials
- Equipment needed to turn Compost Windrow
- Loaders, skid steers or specially made compost windrow turners are required to turn the Compost Windrow.
- Compost Temperature Guage
- Area for receiving food scrap materials,
- Area for storage of “browns”. Straw, Wood Chips, Leaves etc…
- Area for curing and finished Compost piles
Setting up and Operating a Windrow Composting system:
 Step 1 – Preparing area and feed stocks
- Prepare area for receiving materials. Keep a separate area for food scraps and a separate area for your “brown”materials.
- Food scraps must either be incorporated into a compost pile, or covered with soil, brown material, or finished compost every day in order to prevent animal encounters.
Step 2 – Active Composting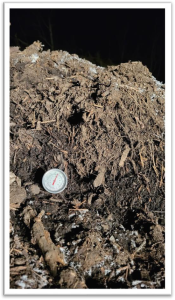
- Mix your food scraps with brown materials.
- The recipe will vary depending on your feed stocks.
- Typically, the mix is 2x volume of brown materials to Volume of Food Scraps with an even mixture of bulkier wood chips and more easily digestible brown materials such as leaves or straw.
- Pile mixed materials into a windrow and cover any exposed food scrap material with finished compost, or soil to reduce pest attractants.
- Measure internal temperature of Compost pile with Compost Temperature probe and record every day
- Turn the pile and ensure that the outside of the pile has been moved to the inside of the pile.
- Pile to be turned if internal temperatures have reached over 130oF for 3 days. Pile may also need to be turned if it needs to be dried out, needs moisture added or if internal temperatures have reached over 170oF.
- Turn the pile each time the internal temperature reaches over 130oF for 3 days.
- Once the pile stops heating and maintains a consistent temperature even after being turned it can move to the Curing pile.
Step 3 – Recovering Bulking agents (optional)
- If you are using Wood Chips in the mix and wish to reuse them in subsequent compost batches you can screen these out to utilize again.
Step 4 -Curing
- Place compost that is no longer heating in a pile no taller than 5 ft tall and let sit for at least 30 days while continuing to monitor for temperature and moisture.
- If Compost is to be sold or used in home gardens it is advisable to get the Compost tested for Maturity either by using a Solvita Test kit, or through a germination test.
Step 5 – Screening
-
- Depending on its end use the material may need to be screened to provide a consistent compost mixture that gardeners recognize as a soil amendment.
- However, if Compost is to be utilized as a mulch or under trees it is not necessary to screen the product. Step 6 – Finished Compost
- Finished Compost will look and smell like soil and may be used in many ways to add to the soil.
A natural process that turns organic material into a nutrient-rich soil amendment. The process involves the decomposition of organic matter by microorganisms like bacteria, fungi, and other decomposers.
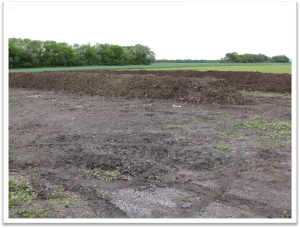
In the context of composting, a windrow refers to a long, narrow pile or row of composting materials strategically arranged to facilitate the decomposition process. Windrows are typically formed outdoors and are commonly used in large-scale composting operations.
Describe the Carbon Rich Materials. These are usually dry and dead materials such as fallen leaves, wood chips or sawdust, paper or cardboard, straw, etc. Typically with Composting Food Scraps, you will need two parts of “Browns” or Carbon-rich materials to every one part of “Greens” or Nitrogen Rich Materials. This ratio can be adjusted throughout the Composting process to create the best end product.
The leftover or discarded portions of food that are not consumed or used.
A Compost Maturity Test that measures CO2 and NH3 respiration.
