Simple 5 Step Guide to Making a Book with Pressbooks
This chapter is based on a chapter in the Pressbooks User Guide and provides an overview of the principle steps in setting up a book.
Create Your Book
If you already have an account on the Sask Polytechnic Pressbooks network, you can create a book by doing the following:
- Contact your Sask Polytechnic Pressbooks admin and ask them to either set up a new book shell or to clone an existing book for you.
- In the email, please provide your preference for a .url address for your book. The web book will be added to the end of the following address https://pressbooks.saskpolytechnic.ca/. Choose the .url address carefully as it cannot be changed later. It must be at least 4 characters and can only contain letters, numbers and dashes (no spaces, capitals or special characters). All other parts of your book can be changed later. One option is to use the title of the book with no spaces, but using dashes where the spaces would be. You may also provide a title for your book, which can be revised later.
- Your book will by default, be set to be a private book. When your book is ready to be made public and you want to include it the catalogs for Sask Polytechnic and Pressbooks, you may contact the Pressbooks admin email for assistance. If you want to immediately have the book available for student use, let the admins know.
- You will be set up as the administrator for your book, which gives you access to the full Pressbooks functionality. You may add other authors and editors to your book. User roles each have certain functionality as listed below:
- Administrator: The highest permission level. Administrators can add, edit, and delete posts; they can add and delete users; and they can delete a book.
- Editor: Editors can add, edit, manage, and publish posts — even those of others.
- Author: Authors can write, edit, and publish their own posts, but not those of others.
- Contributor: Contributors can write and edit their own posts. They cannot publish their posts.
- Subscriber: The lowest permission level. Subscribers can only read posts.
Dashboard Links by User Type Dashboard Link Administrator Editor Author Contributor Subscriber WP-Piwik Yes No No No No Organize Yes Yes Yes Yes No Private/Public setting (Organize) Yes No No No No Book Info Yes No No No No Appearance Yes Yes (but no “Themes”) No No No Export Yes Yes Yes Yes No Plugins Yes No No No No Media Yes Yes Yes No No Users Yes No No No No Profile (Users) Yes Yes Yes Yes Yes Tools Yes Yes Yes Yes No Import (Tools) Yes Yes Yes Yes No Settings Yes No No No No Table is from BC Campus. Pressbooks Guide. (CC by 4.0)
Add Your Book Information
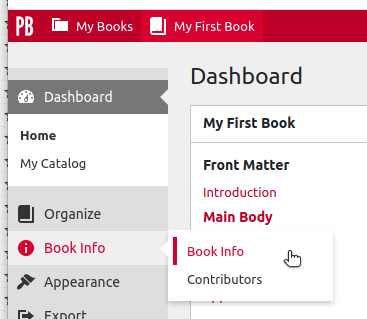
The Book Info page is where you add and edit important information (metadata) about your book.
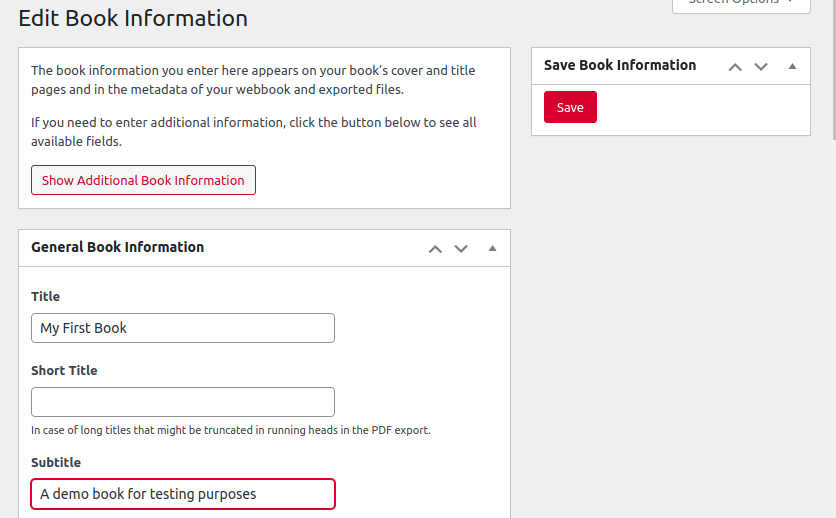
- From your book dashboard, click ‘Book Info’
- Enter your desired Book Information and click ‘Save‘ in the ‘Save Book Information‘ widget.
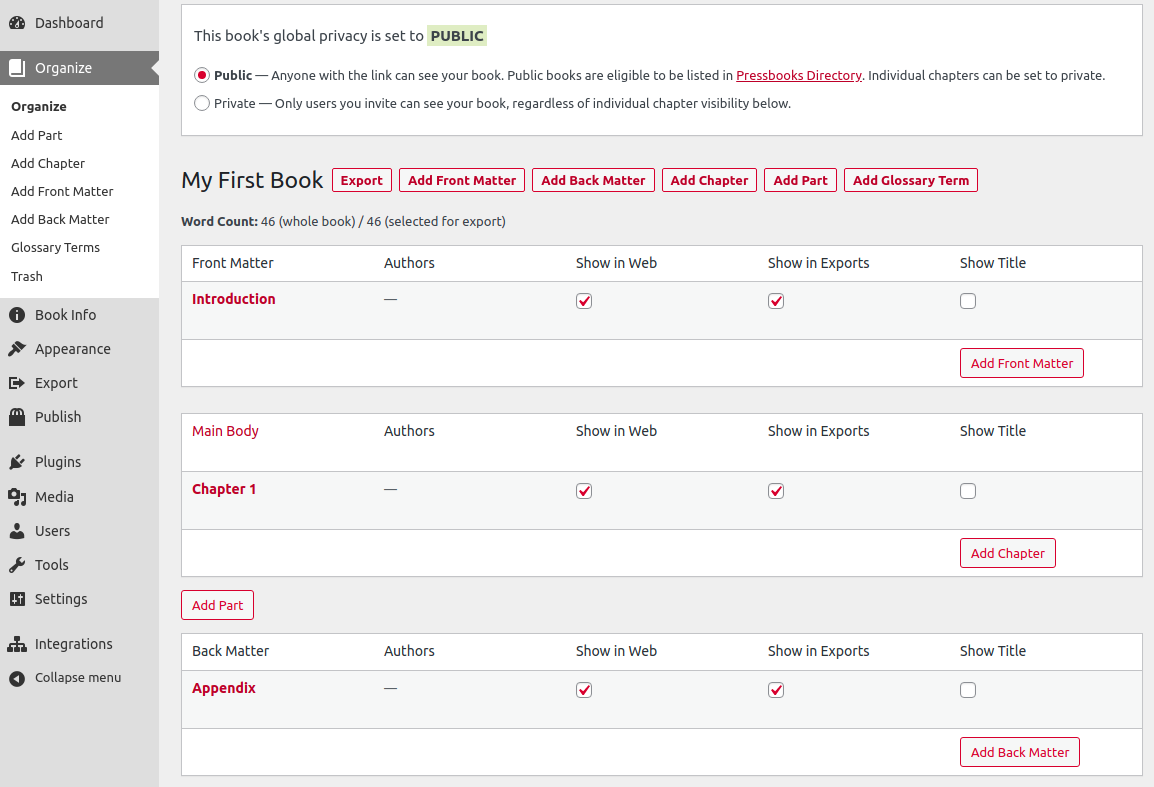
Add and Organize Your Text
You can add and organize your text from the Organize page in the left sidebar menu of your book dashboard. The organize page will allow you to see all of your existing content, its order, and its display status. You’ll see the three main components of your book on this page:
Front Matter: Content in this section may include your introduction, foreword, dedication, and more. You can read more in our chapter on Front Matter.
Parts & Chapters: These comprise main body of your book. Your book can contain one or more Parts. Each part can contain one or more Chapters. Learn more in our chapters on adding Parts and adding Chapters to your book.
Back Matter: Content in this section may include your epilogue, appendix, information about contributors, and more. More details can be found in our chapter on Back Matter.
For more information on other ways to import your text into Pressbooks, check out our guide chapter on How to Get Your Book into Pressbooks.
Choose Your Book Theme
Once you’ve entered or imported the content that will make up your book, you can select and apply your preferred Theme. Each Pressbooks theme is a unique template which governs the display of your webbook and export formats (including PDF and ebook exports).
Browse available themes by clicking Appearance > Themes from your Book Dashboard:
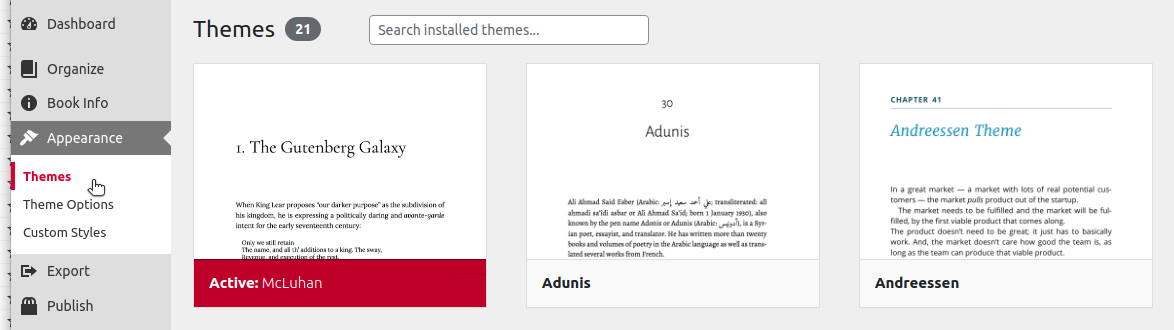
Once you’ve selected a theme, you can customize several of the design elements for your webbook and export files using Theme Options or Custom CSS. Sask Polytechnic has a custom theme that will be added as the base for books published on their platform.
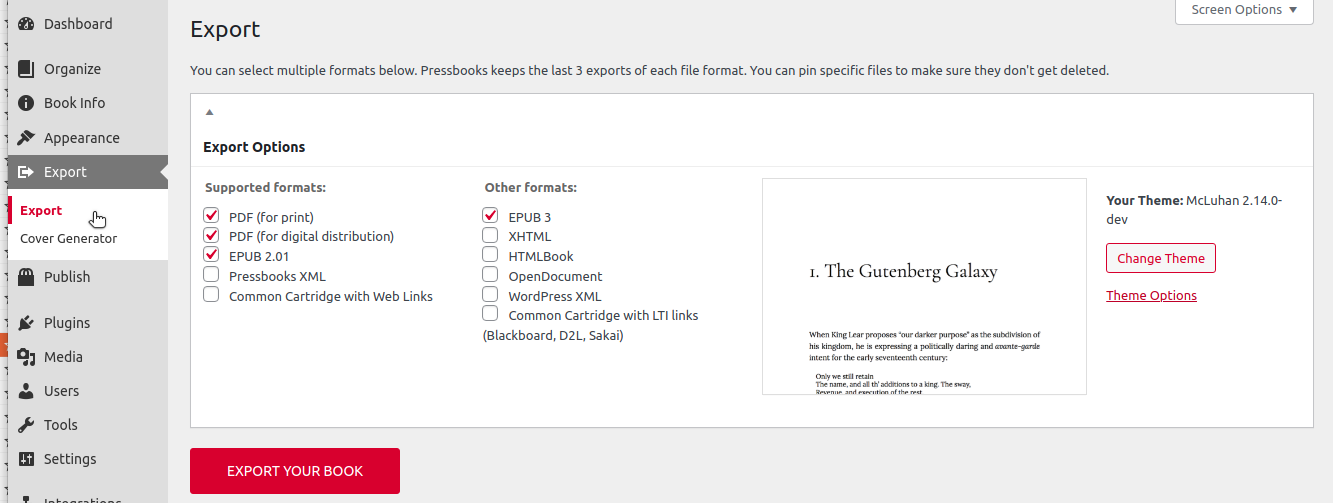
Export Your Book
Once you’re happy with the appearance of your book, you can publish it to the web as a webbook or produce exports for distribution or sale. To produce and download export files for your book, click ‘Export‘ from your book Dashboard: